
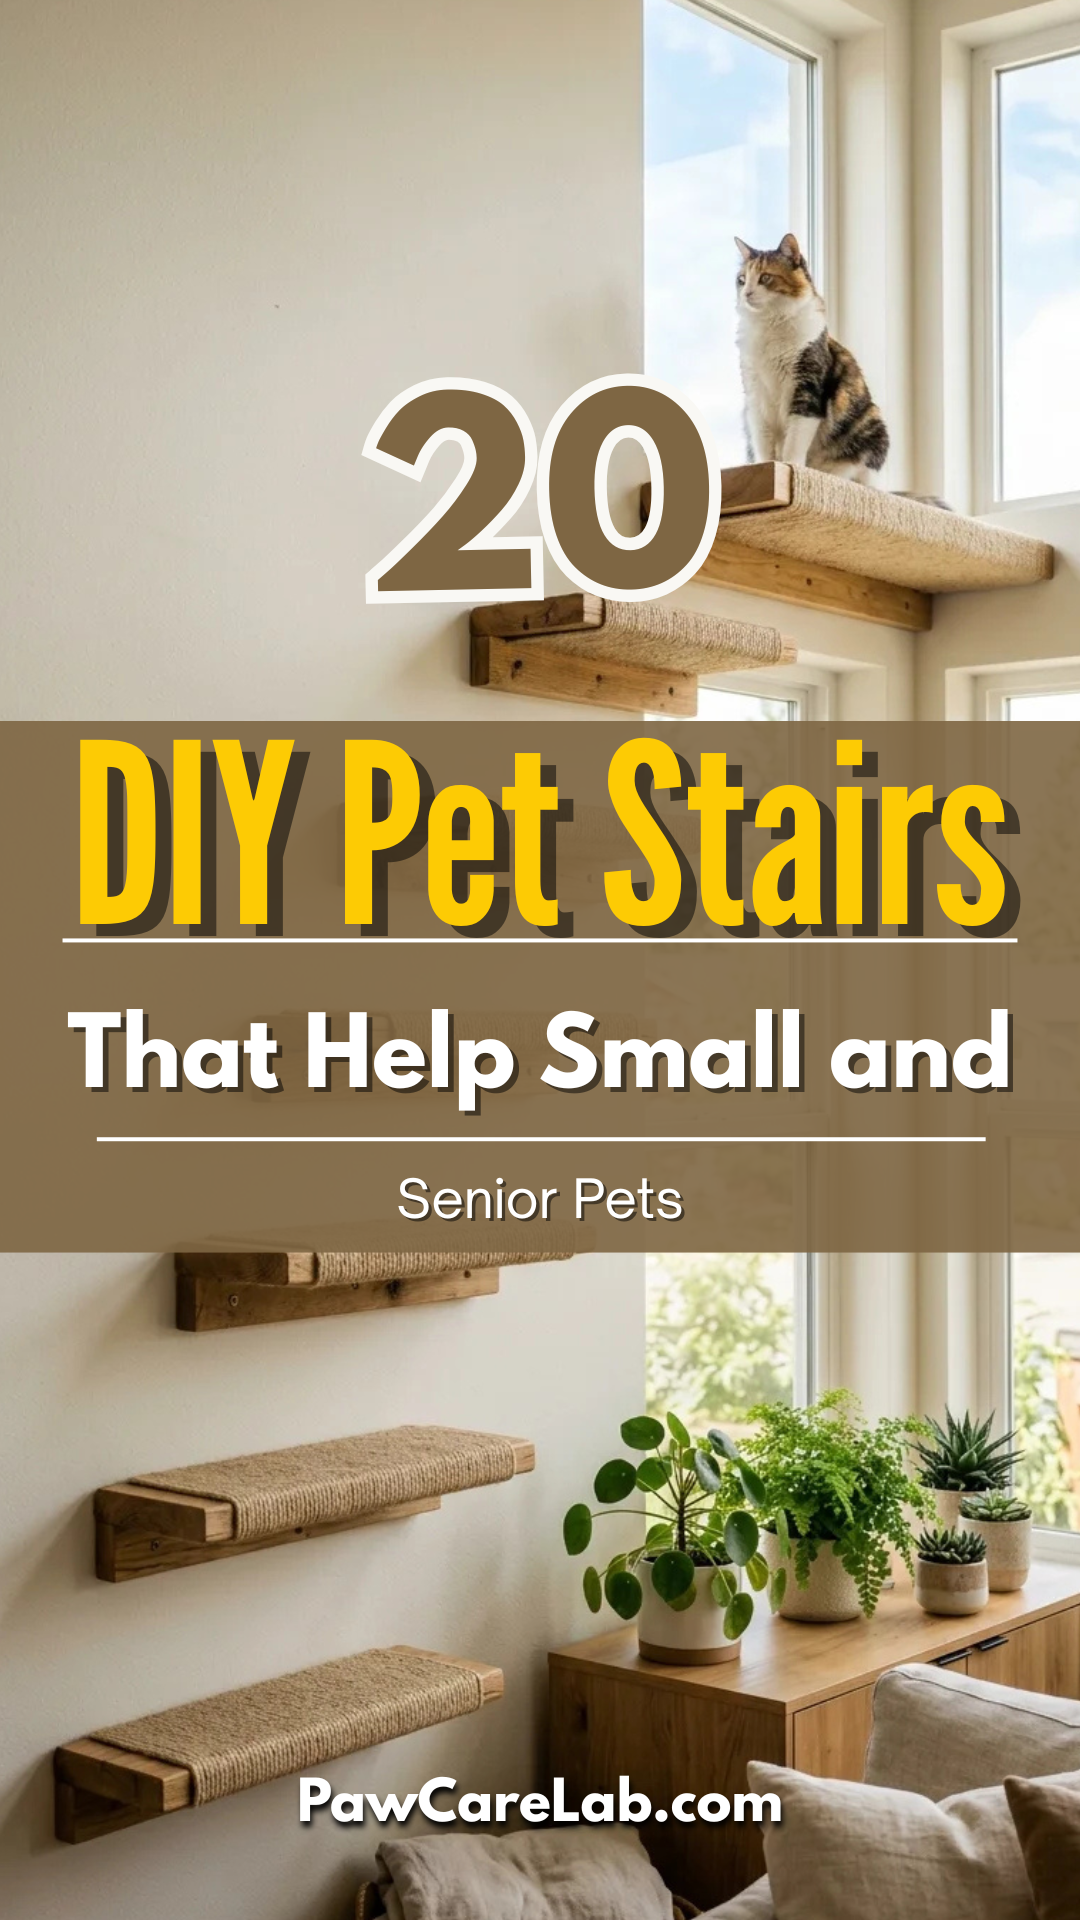
As our furry companions age, or if they happen to be born with shorter legs, the simple act of hopping onto a sofa or bed can become a daunting—and sometimes painful—task. Joint issues like arthritis or hip dysplasia in senior pets, and the risk of IVDD in breeds like Dachshunds, make pet stairs a necessity rather than a luxury. While commercial pet stairs can be expensive and often lack aesthetic appeal, building your own allows you to customize the height, width, and style to perfectly match your home decor and your pet’s specific needs.
Here are 17 creative, sturdy, and budget-friendly DIY pet stair projects to help your four-legged friends navigate their world with ease.
1. Cardboard Boxes
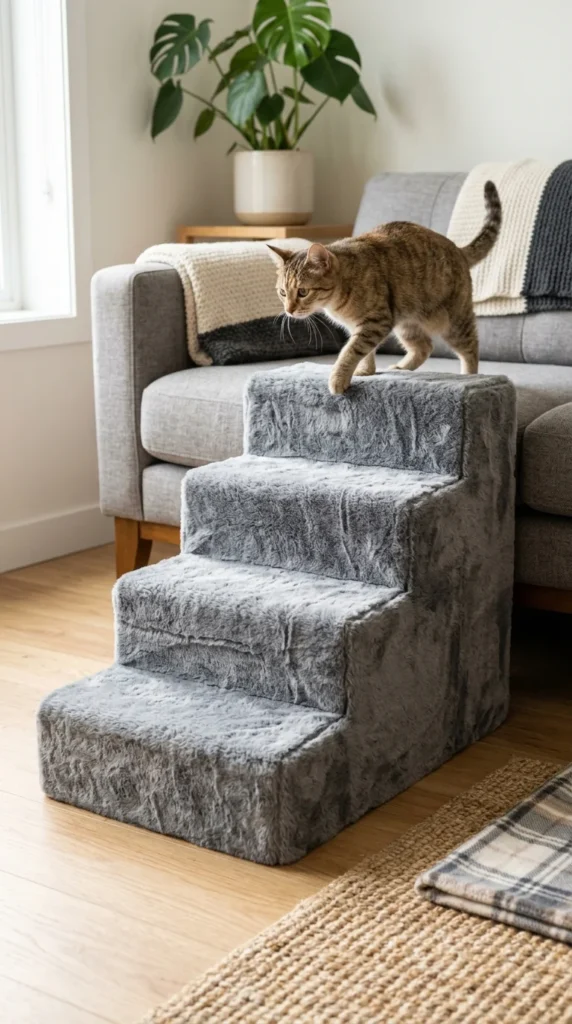
For a quick and incredibly budget-friendly solution, look no further than your recycling bin. Cardboard stairs are surprisingly sturdy when constructed correctly. The key is to use heavy-duty, double-walled boxes and fill the interior with crumpled paper or additional cardboard slats to prevent sagging. By taping multiple boxes together in a tiered fashion and covering the entire structure with a decorative fabric or a non-slip rug remnant, you create a lightweight set of stairs that can be moved from room to room with ease. This is an excellent temporary solution or a way to test if your pet will actually use stairs before committing to a wooden build.
2. Storage Cubes
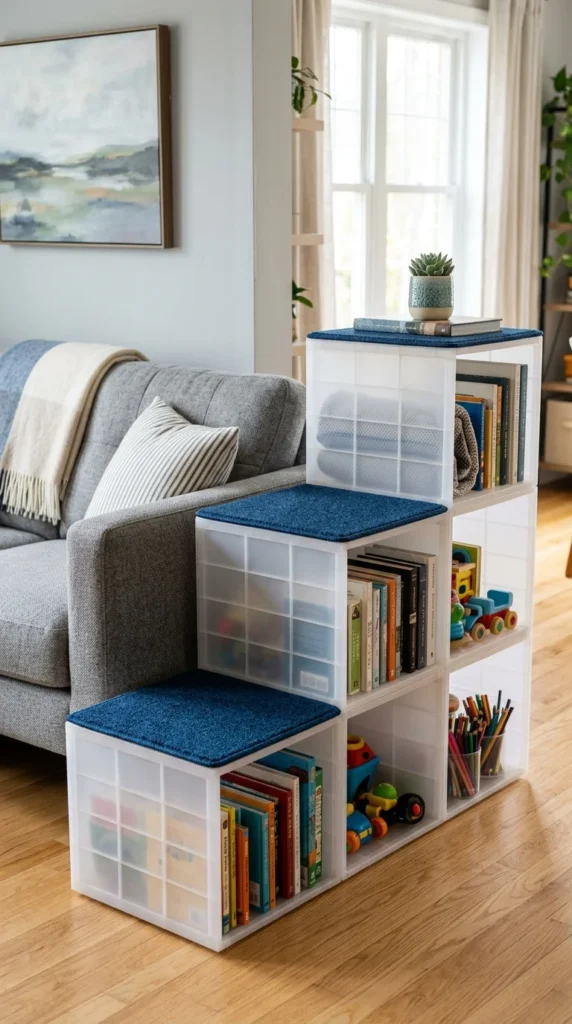
Modular storage cubes are a DIYer’s best friend. These versatile units can be snapped together in a stair-step configuration in minutes. Because they are designed to hold weight, they are naturally stable for small to medium-sized pets. To make them “pet-ready,” simply glue or Velcro squares of carpet or rubber matting to the top of each “step” to ensure your pet doesn’t slip. The added bonus? You can use the interior of the cubes to store pet toys, leashes, or grooming supplies, making this a multi-functional piece of furniture.
3. Plywood Frame
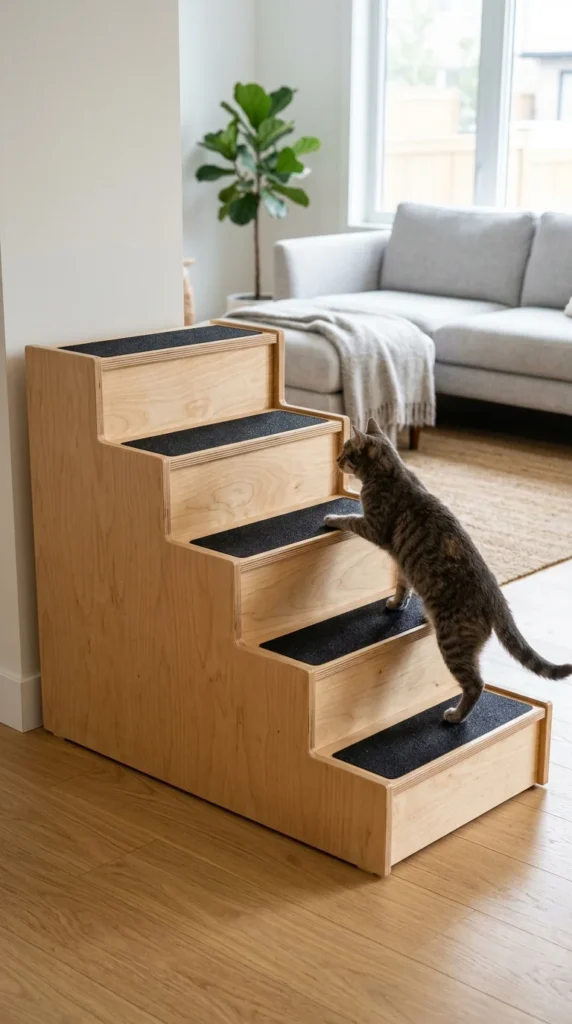
If you have basic woodworking skills, a plywood frame is the gold standard for DIY pet stairs. Using a single sheet of 3/4-inch plywood, you can cut out two “stringers” (the zigzag sides) and several “treads” (the flat parts you step on). This design is incredibly durable and can support even the heaviest senior dogs. By sanding the wood smooth and applying a coat of pet-safe stain or paint, you can make these stairs look like a high-end piece of custom furniture. Adding a bit of carpet or grip tape to the treads is essential for safety, especially for older pets with mobility issues.
4. Foam Blocks
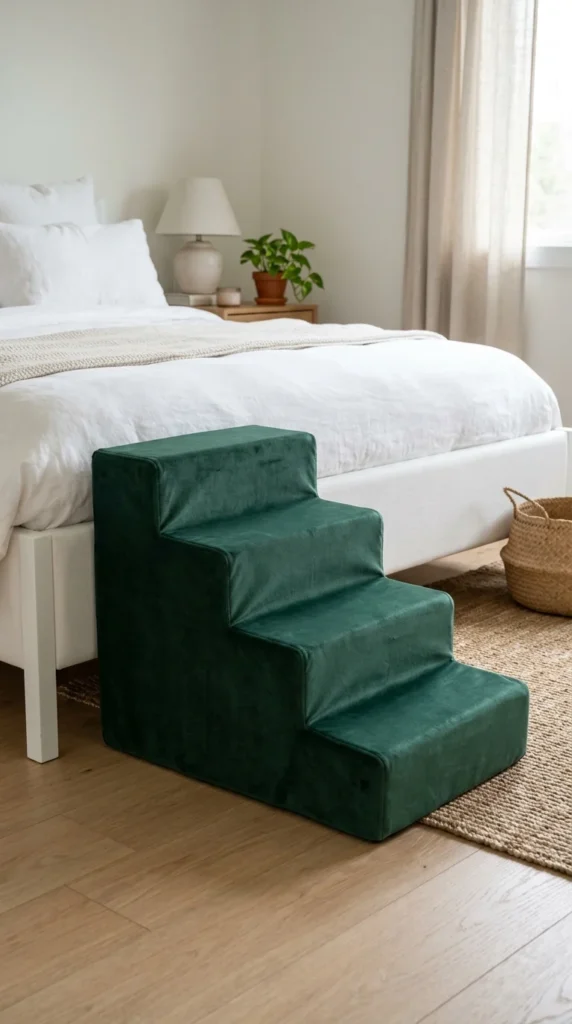
For pets that are prone to bumping into things or for owners who want a “soft” look, high-density foam is the way to go. You can purchase large blocks of upholstery foam and cut them into a staircase shape using a heavy-duty electric carving knife. The beauty of foam is its weight—it’s incredibly light and won’t hurt your shins if you stumble over it in the middle of the night. To finish, sew a simple fabric cover or use “no-sew” fabric glue to wrap the foam. This provides a gentle, cushioned ascent for pets with sensitive paws or sore joints.
5. Repurposed Drawers
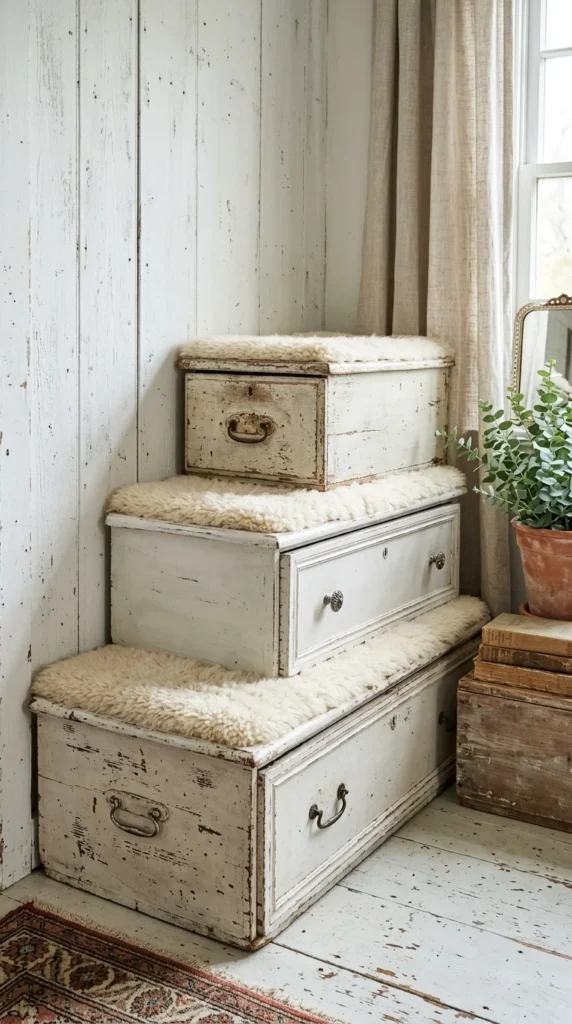
Give new life to an old, broken dresser by repurposing the drawers into pet stairs. This project is perfect for those who love a vintage or farmhouse aesthetic. By stacking drawers of decreasing lengths (or widths) and securing them together with wood screws, you create a unique, tiered look. You can even leave the drawer pulls on the front for added character. Filling the “tread” area with a piece of plush carpet or a custom cushion makes the climb comfortable and stylish.
6. Plastic Crates
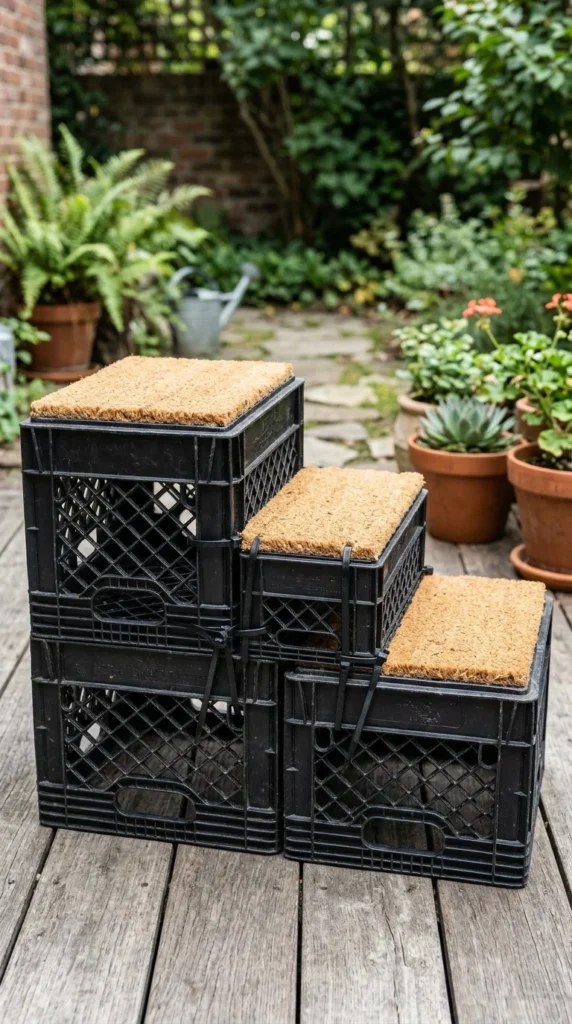
For an industrial or outdoor-friendly option, plastic milk crates are nearly indestructible. These are particularly useful for helping older dogs get into a tall SUV or onto a porch. By zip-tying the crates together side-by-side and on top of one another, you can create a wide, stable platform. Because the plastic can be slippery, it’s vital to bolt or glue a piece of heavy-duty rubber matting or outdoor carpeting to the top surfaces. This is a rugged, no-nonsense DIY that gets the job done.
7. Pallet Wood
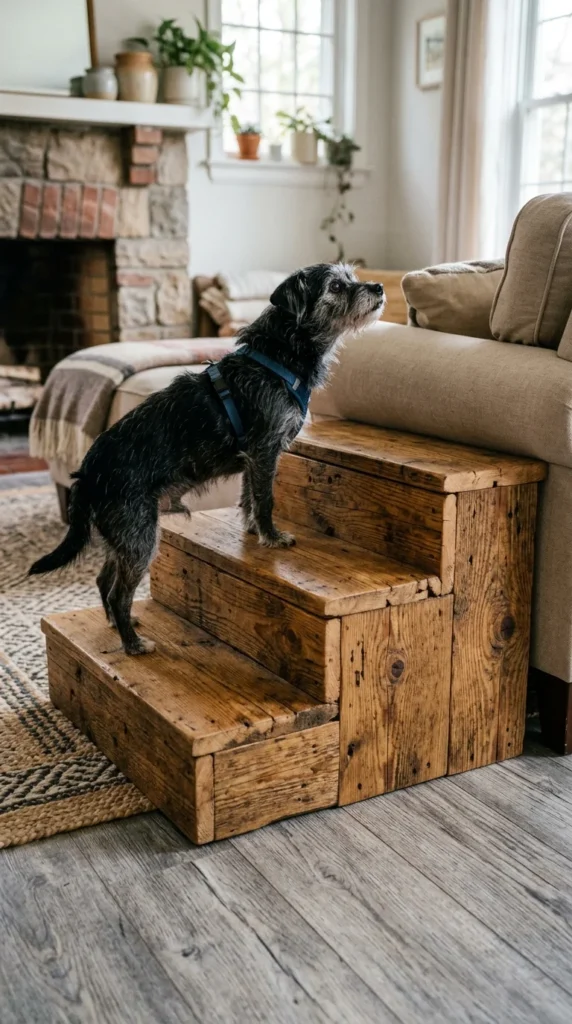
Pallet projects are a staple of the DIY community because the wood is often free or very cheap. To make pet stairs, dismantle a pallet and use the sturdy 2x4s for the internal frame and the flat slats for the treads and risers. This creates a rustic, “mountain lodge” look that is perfect for a cozy living room. Make sure to sand the wood thoroughly to remove any splinters and use a non-toxic finish, as pallets can sometimes be treated with chemicals.
8. Floating Shelves
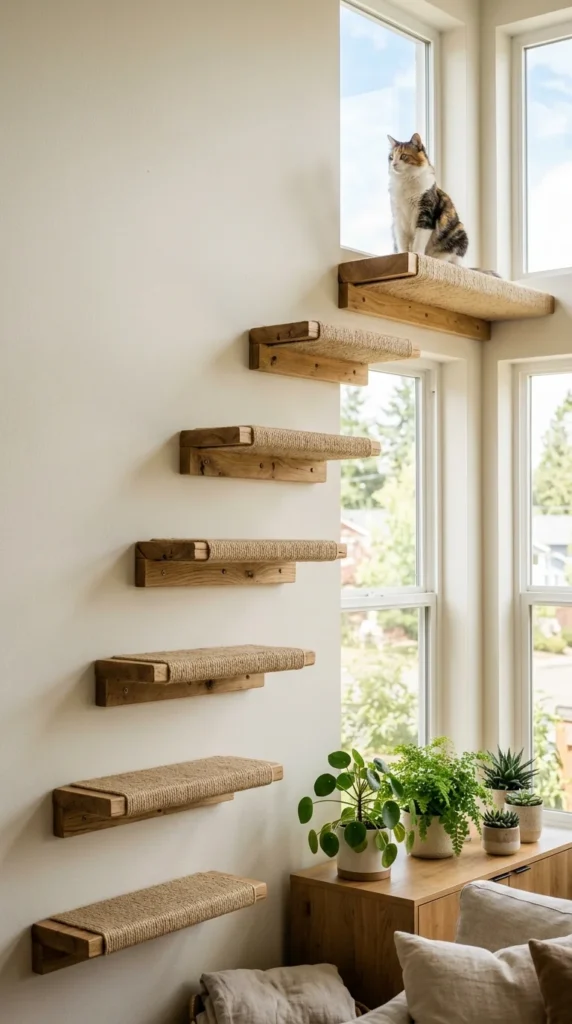
If you have a cat or a very agile small dog, wall-mounted “stairs” can save valuable floor space. By installing heavy-duty floating shelves in a staggered, diagonal pattern, you create a vertical playground that doubles as a staircase. This is particularly popular for “catified” homes. To ensure safety, the shelves must be anchored into wall studs. Covering the top of each shelf with sisal rope or carpet provides the necessary traction for a safe climb.
9. Ottoman Conversion
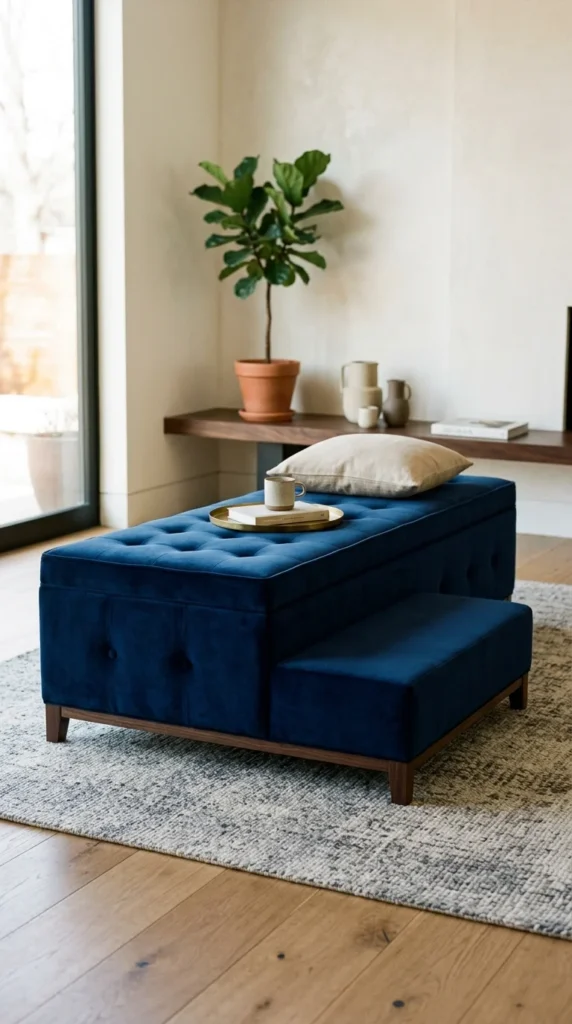
Sometimes the best DIY is a modification of something you already own. If you have a large ottoman, you can build a smaller “sub-step” that sits right next to it. By using a wooden box and upholstering it in a fabric that matches your ottoman, you create a seamless two-step process to the couch. This is a great “low-profile” solution for pets who just need that one extra boost to make it to their favorite napping spot.
10. Suitcase Stack
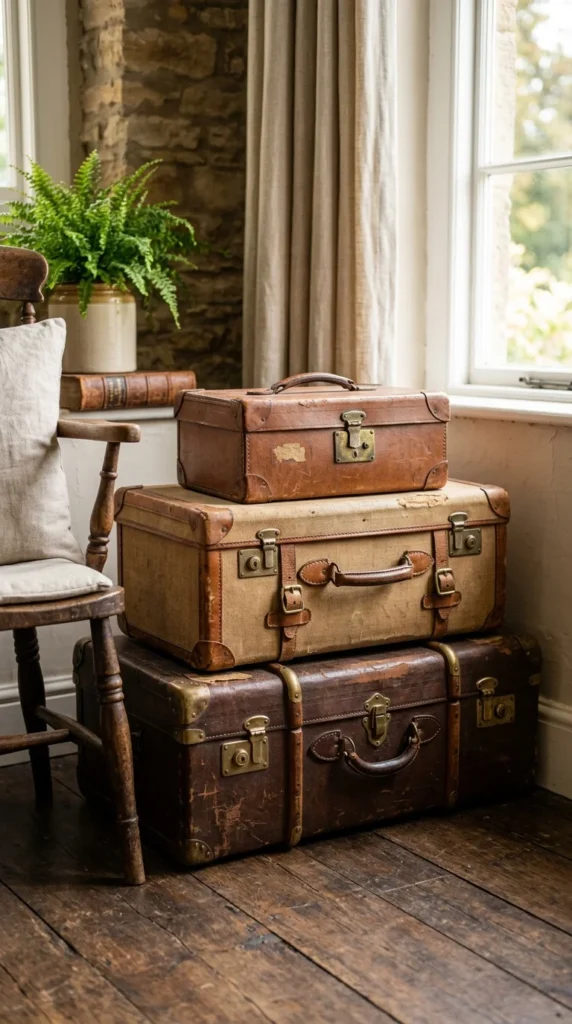
For the stylish pet owner, a stack of vintage suitcases can serve as a whimsical set of stairs. Choose hard-shell suitcases for stability. You can secure them to each other using industrial-strength Velcro or by drilling through the frames and bolting them together. Not only does this look like a curated piece of decor, but the interior of the suitcases can also serve as hidden storage for out-of-season pet clothes or extra blankets.
11. Concrete Blocks
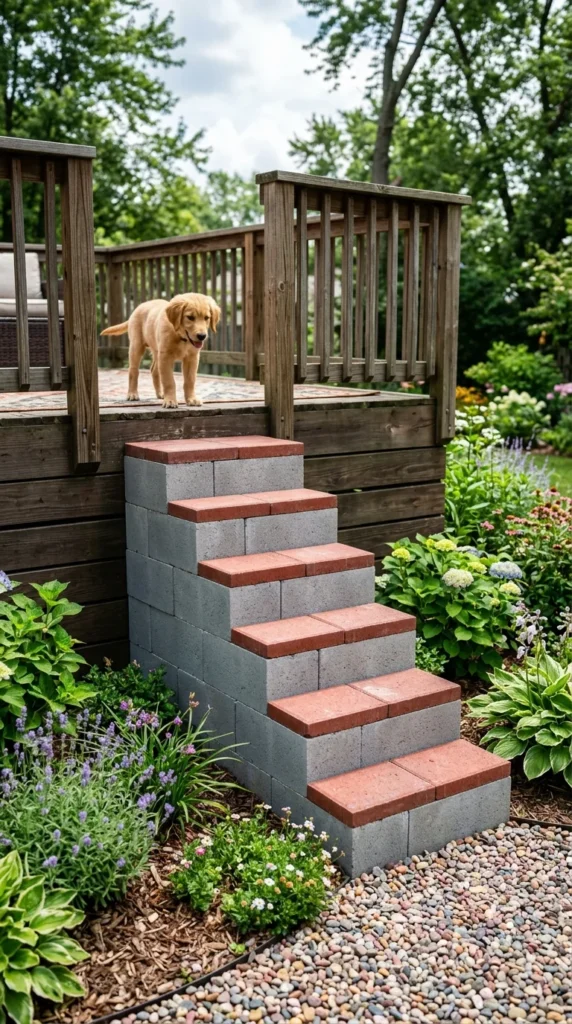
If your senior pet struggles to get from the yard onto the back deck, a permanent outdoor solution is needed. Cinder blocks (concrete blocks) are an excellent choice because they are weather-resistant and heavy enough not to shift under a dog’s weight. You can stack them in a simple tiered design. To make them more attractive and easier on the paws, glue flat paving stones or outdoor-rated rubber tiles to the top of each block.
12. Bookcase Hack

Many low bookcases can be easily converted into stairs. By turning a horizontal bookcase on its side and adding internal supports, you can create a “staircase” where the steps are actually the sides of the shelves. This DIY requires some measuring and a few extra pieces of lumber to create the varying heights, but the result is a clean, modern-looking set of stairs that blends perfectly with other shelving units in the room.
13. Scrap Lumber
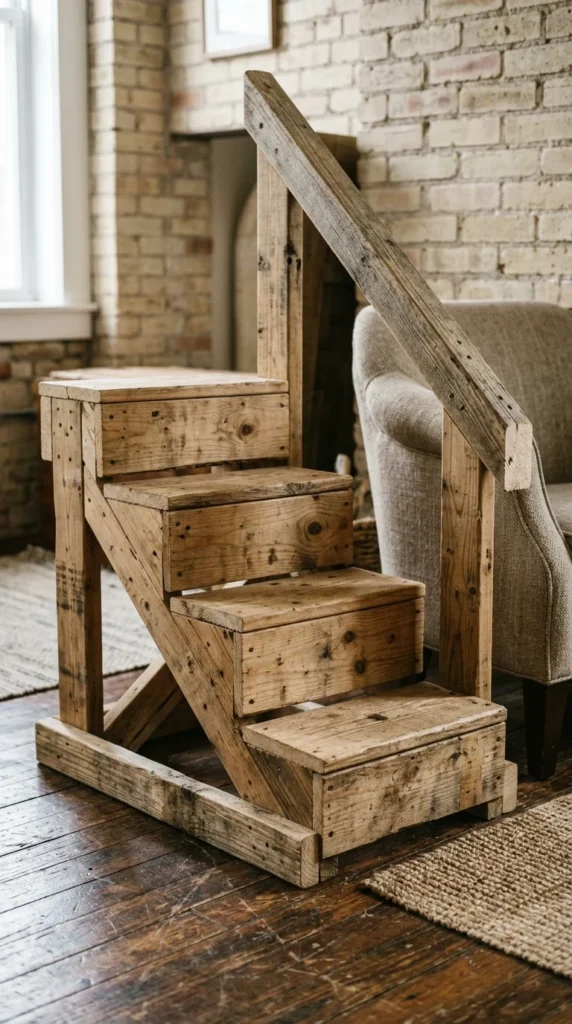
If you’re a hobbyist woodworker, you likely have a “burn pile” or a scrap bin full of 2x4s and plywood off-cuts. These can be cobbled together into a very sturdy set of stairs. The beauty of using scrap lumber is that the design can be completely organic based on the pieces you have available. A common design involves creating two triangular side panels and bridging them with 1×6 boards for the steps. A quick coat of paint hides the fact that the wood didn’t match originally.
14. PVC Pipes
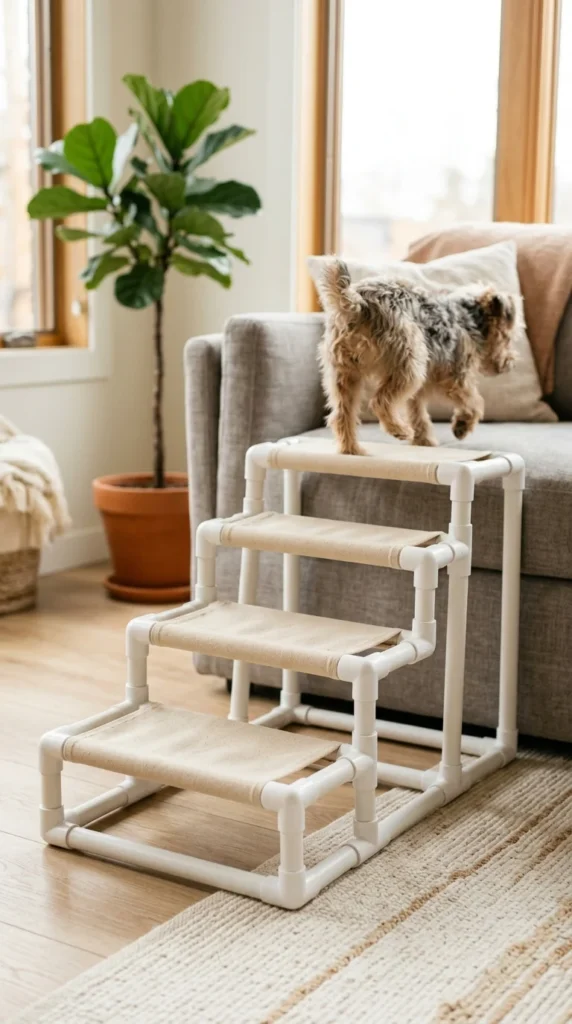
For a lightweight, portable, and surprisingly strong option, PVC pipe is an excellent medium. By using various lengths of pipe and “T” and “elbow” connectors, you can build a skeletal frame of a staircase. Instead of solid wood steps, you can use heavy-duty fabric (like Cordura or canvas) stretched tightly over the frame, similar to a camping chair. This design is great for travel or for pets who prefer a slightly “springy” surface under their paws.
15. The “Ramp-Stair” Hybrid
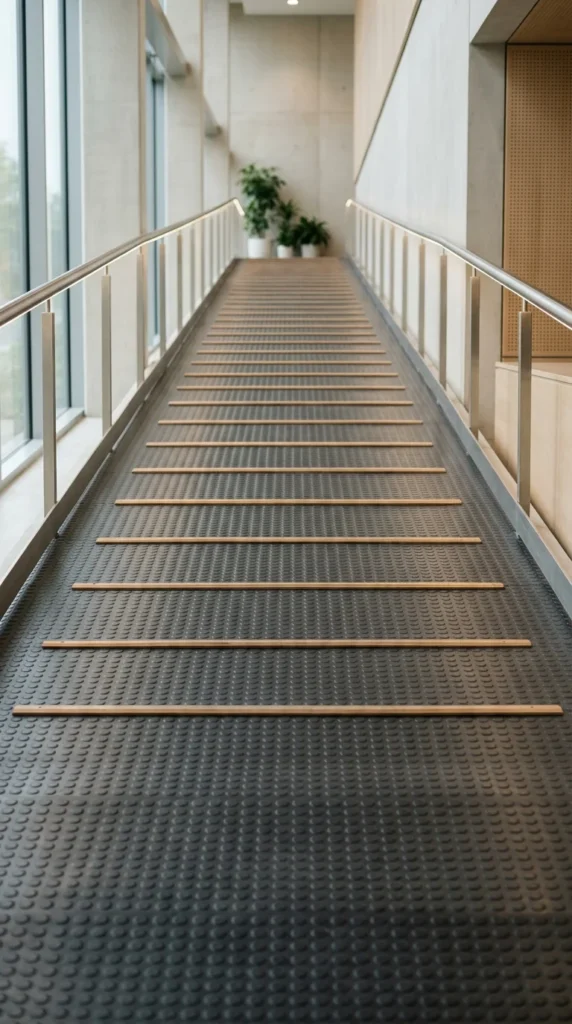
Some pets, particularly those with extreme back issues, find traditional stairs difficult even if the risers are short. A “ramp-stair” hybrid is a long incline with very shallow “slats” or “steps” built in. This provides the grip of stairs with the ease of a ramp. DIYing this involves a long piece of plywood reinforced with a frame, with thin strips of wood nailed across the width to act as “speed bumps” for the paws, preventing the pet from sliding back down.
16. IKEA Frosta Hack
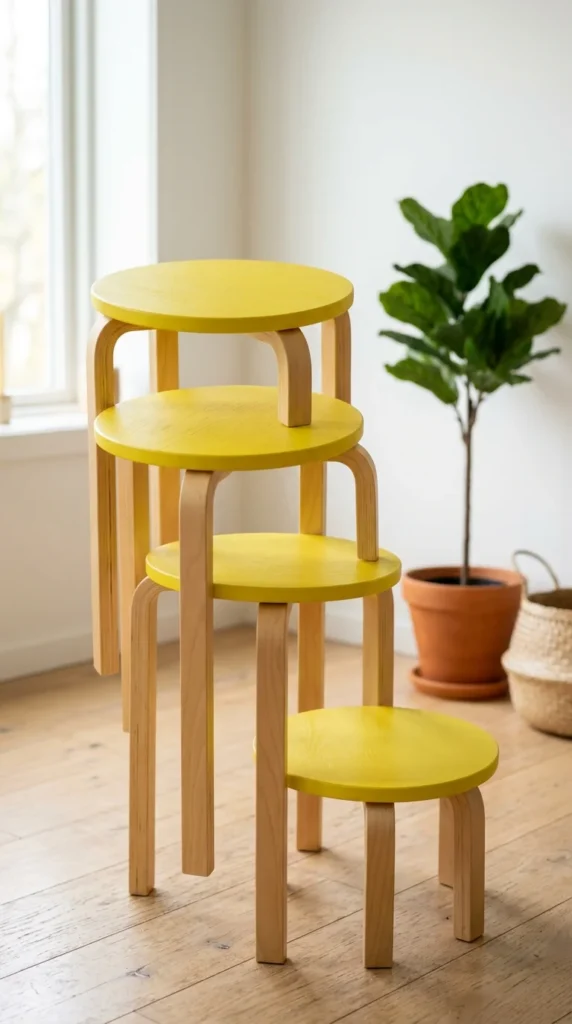
The iconic IKEA Frosta stool (or similar wooden stools) can be hacked to create a stylish, circular set of stairs. By shortening the legs of three different stools to three different heights and securing the stools together in a cluster, you create a “spiral” staircase effect. This is perfect for small dogs or cats and takes up very little floor space while looking like a piece of contemporary art.
17. Upholstered Plywood Box
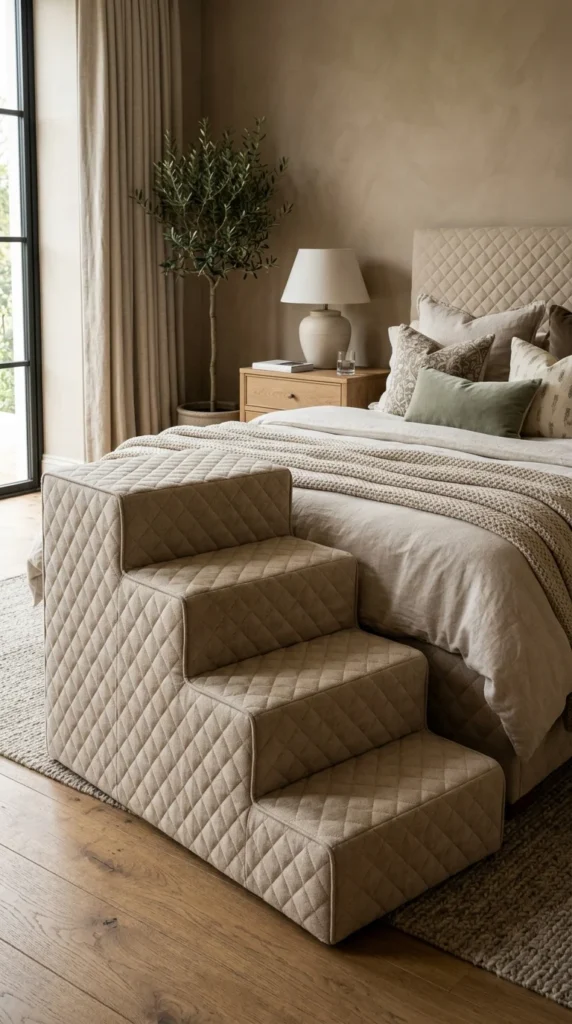
For a professional, “store-bought” look, build a basic box-style staircase out of MDF or plywood and then upholster the entire thing. You can add a layer of thin batting (stuffing) under the fabric to give it a soft, rounded appearance. Using a heavy-duty staple gun, you can pull the fabric tight around the corners for a crisp finish. This allows you to match your pet stairs exactly to your headboard, curtains, or sofa fabric, making them virtually invisible in the room’s design.
Key Tips for DIY Pet Stairs:
- Rise and Run: For senior dogs, keep the “rise” (height of the step) low—around 4 to 6 inches is ideal. The “run” (depth of the step) should be deep enough for their entire paw and part of their leg to fit comfortably.
- Traction is Mandatory: Never leave the steps as bare wood or plastic. Always add carpet, rubber, or grip tape.
- Stability First: Ensure the base is wider than the top to prevent the stairs from tipping over if the pet jumps or leans on the edge.
- Training: Some pets are hesitant to use stairs. Use high-value treats to lead them up and down the steps until they feel confident.